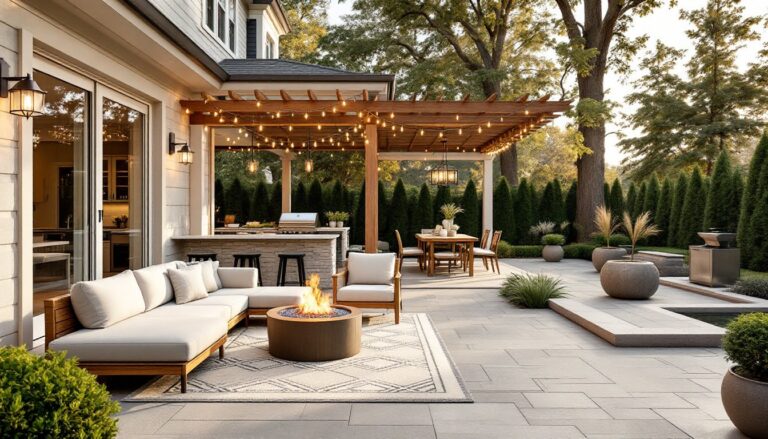
An in ground fire pit doesn’t just add warmth to a backyard, it creates a destination. Unlike portable fire bowls that wobble on uneven patios or metal rings that rust after a season, a properly built in ground pit becomes a permanent feature that anchors outdoor living spaces. The design options range from minimalist steel-lined rectangles to natural stone circles that look like they’ve always been part of the landscape. This guide walks through four proven designs, covering materials, excavation basics, and the structural considerations that separate a weekend project from a safety hazard.
Table of Contents
ToggleKey Takeaways
- In ground fire pit designs offer better wind protection, heat retention, and safety than above-ground alternatives, with flames sitting lower to reduce hazards from kids, pets, and overhanging branches.
- The four proven in ground fire pit ideas include classic round stone, modern rectangular steel-lined, sunken conversation pits with built-in seating, and natural flagstone designs, each suited to different landscape styles and skill levels.
- Proper installation requires firebrick or refractory liners rated for direct flame, a 4–6 inch gravel drainage base, and attention to local fire codes mandating 10–15 feet clearance from structures and trees.
- Maintenance and safety depend on using seasoned hardwood fuel, removing cooled ash within 24 hours, inspecting drainage quarterly, and replacing cracked firebrick or rusted steel liners promptly to prevent heat transfer hazards.
- An in ground fire pit becomes a permanent outdoor living feature that anchors backyard spaces without requiring winter storage, UV protection, or risk of tipping like portable fire bowls.
Why Choose an In Ground Fire Pit Over Above-Ground Options
In ground fire pits sit lower to the ground, typically 12 to 18 inches deep, which naturally blocks wind better than raised models. This design creates a more efficient burn with less smoke drifting into seating areas. The excavated pit also provides better heat retention, extending the comfort zone on cooler evenings.
From a safety standpoint, the recessed design keeps flames farther from kids, pets, and overhanging branches. Most local fire codes require flames to be at least 10 feet from structures and 15 feet from tree canopies, but an in ground pit reduces the overall flame height, making compliance easier in tighter yards.
Installation requires more upfront labor, digging, drainage planning, and often a gravel base, but the trade-off is permanence. A well-built in ground pit won’t tip over, won’t need storing in winter, and won’t degrade from UV exposure like above-ground metal models. Homeowners planning to stay put for years typically find the investment worthwhile.
Classic Round Stone In Ground Fire Pit
The round stone pit is the most forgiving design for first-time builders. The circular shape distributes heat evenly and doesn’t require perfect right angles, a few degrees off won’t show.
Materials and Tools Needed:
- Firebrick or refractory concrete (for pit lining)
- Natural stone or concrete retaining wall blocks (for outer ring)
- Pea gravel or crushed stone (4–6 inches for base)
- Level, shovel, tamper, masonry adhesive
- Safety gear: Gloves, safety glasses, dust mask when cutting stone
Step-by-Step Installation:
- Mark and excavate: Use a garden hose or marking paint to outline a 36- to 48-inch diameter circle. Dig 12–15 inches deep, checking for underground utilities first (call 811).
- Add drainage base: Pour 4–6 inches of pea gravel or ¾-inch crushed stone. Tamp firmly to create a stable, draining foundation.
- Line the pit: Install firebrick vertically around the inner wall, setting them in refractory mortar or high-temp adhesive. Firebrick withstands direct flame: standard brick or concrete will crack.
- Build the outer ring: Stack natural stone or concrete blocks around the firebrick liner, leaving a 2–3 inch gap. This airspace insulates the outer wall and keeps the stones cooler to the touch.
- Backfill the gap: Fill the space between liner and outer ring with sand or additional gravel for drainage.
A 42-inch diameter pit comfortably serves 6–8 people seated on camp chairs or ground-level seating. For gatherings among those interested in outdoor entertaining ideas, consider extending the stone ring outward to create a built-in bench cap.
Modern Rectangular Steel-Lined Fire Pit
Rectangular pits suit contemporary landscapes and pair well with geometric paver patios. The linear design also makes efficient use of narrow yard spaces where a round pit would feel cramped.
Key Materials:
- Steel fire pit ring or liner: Look for 10-gauge or thicker steel with a powder-coated or high-temp paint finish. Stainless steel costs more but resists rust in wet climates.
- Concrete pavers or cut stone (for coping/edge)
- Fireproof insulation board (optional, for extra liner protection)
- Metal grate or mesh spark screen
Construction Notes:
- Excavate to liner dimensions: A typical prefab steel liner measures 24 x 36 inches and requires a hole about 30 x 42 inches to allow for backfill.
- Set the liner: Place the steel ring on a 4-inch gravel base. Ensure the top edge sits 2–3 inches above final grade to prevent runoff from entering the pit.
- Frame with pavers: Lay concrete pavers or cut bluestone around the perimeter, creating a 12- to 18-inch border. Use polymeric sand or mortar in the joints for stability.
- Seal edges: Apply high-temp silicone between the liner and coping stones to block debris and improve the finished look.
Steel liners heat up faster than masonry, making them ideal for short burns. They’re also lighter and easier to remove if the pit needs relocation. For a polished aesthetic, coordinate the liner finish with other metal accents, modern railings, planters, or outdoor kitchen frames.
Sunken Conversation Pit With Built-In Seating
This design takes the in ground concept a step further, excavating a larger area to create a recessed seating zone around the fire. It’s more involved than a standalone pit, but the result is a true outdoor room.
Planning Considerations:
- Excavation depth: Dig 18–24 inches below grade for seating, plus an additional 12 inches in the center for the fire pit itself.
- Drainage: Sunken areas collect water. Install a French drain or perforated pipe along the perimeter, sloping away from the pit.
- Retaining walls: Use stacked stone, concrete blocks, or timber to hold back the surrounding grade. Walls over 24 inches may require engineer-stamped plans depending on local codes.
Seating Options:
- Poured concrete benches: Form and pour L-shaped benches around the pit perimeter. Top with cushions or leave bare for a minimalist look.
- Stone or block benches: Build low walls (16–18 inches high, 16 inches deep) using the same material as the pit surround. Cap with bluestone or concrete for a smooth seating surface.
- Timber sleepers: Pressure-treated 6×6 or 8×8 timbers set horizontally create rustic bench seating. Anchor with rebar driven through pre-drilled holes.
Accessibility matters: include at least one stepped entrance with 6- to 8-inch risers. For those exploring garden design ideas, integrate plantings around the upper edge to soften the transition and add privacy.
This style works best in yards with good drainage and stable soil. Clay-heavy or sandy soils may shift over time, cracking retaining walls. If in doubt, consult a landscape architect or structural engineer before digging.
Natural Flagstone Fire Pit With Rustic Appeal
Flagstone, typically sandstone, slate, or quartzite, delivers an organic, unstructured look that blends into naturalistic landscapes. The irregular shapes mean no two pits look identical.
Material Selection:
- Flagstone thickness: Use 2- to 3-inch thick pieces for the pit wall. Thinner stones crack under heat cycling.
- Mortar: Type S or refractory mortar for the inner joints. Avoid standard Type N, which doesn’t handle high temps.
- Base stone: Larger, flatter pieces for the first course provide a stable foundation.
Installation Steps:
- Dry-fit first: Lay out stones around the pit perimeter without mortar. Adjust placement to minimize gaps and create a pleasing pattern.
- Set the base course: Mortar the first layer of flagstone onto the gravel base, checking for level.
- Stack and mortar: Build up 2–3 additional courses, staggering joints like brickwork. Keep mortar joints tight (½ inch or less).
- Tool the joints: Strike mortar joints flush or slightly recessed for a clean finish. Wipe excess before it cures.
- Cure time: Allow 48–72 hours before lighting the first fire. Early heat exposure can crack fresh mortar.
Flagstone pits pair well with xeriscaped yards, boulder outcroppings, and native plantings. The stone’s natural color variation, grays, tans, rusts, means it doesn’t need painting or sealing, though a penetrating sealer can reduce staining from ash.
For builders interested in DIY home projects, flagstone is more forgiving than cut pavers. Minor irregularities add character rather than signaling mistakes.
Essential Safety and Maintenance Tips for In Ground Fire Pits
Clearances and Codes:
- Maintain 10 feet minimum from structures, fences, and overhangs. Some jurisdictions require 15–25 feet, check local fire marshal rules.
- Keep a fire extinguisher, hose, or bucket of sand within 20 feet during burns.
- Install a spark screen or mesh cover for windy conditions or if burning softwoods that pop.
Fuel Choices:
- Seasoned hardwood: Burns cleaner and hotter than green or softwood. Ash, oak, and maple are ideal.
- Avoid: Treated lumber, plywood, painted wood, or trash. These release toxic fumes and leave corrosive ash.
- Gas conversion: Some in ground pits accommodate natural gas or propane burners. This requires a licensed plumber and gas line inspection.
Drainage and Ash Removal:
- After each burn, remove ash once fully cooled (wait 24 hours). Wet ash is corrosive and accelerates liner deterioration.
- Check drainage quarterly. Clogged gravel bases cause pooling, which can crack masonry during freeze-thaw cycles.
- In freeze-prone climates, cover the pit in winter or ensure the base drains completely to prevent ice expansion damage.
Annual Inspections:
- Inspect firebrick for cracks or spalling. Replace damaged sections immediately, compromised liners allow heat to reach outer walls, creating burn hazards.
- Re-point mortar joints if they’ve eroded more than ¼ inch deep.
- Steel liners should be checked for rust or warping. Surface rust is cosmetic, but structural rust (pitting, thinning) requires liner replacement.
PPE During Construction and Use:
- Wear leather gloves when handling hot tools or stones.
- Use safety glasses during masonry cutting or grinding.
- A dust mask or respirator is essential when cutting stone or mixing mortar.
- Keep closed-toe shoes and long pants on during burns, sparks and embers travel.
Conclusion
An in ground fire pit transforms underused backyard space into a year-round gathering spot. Whether choosing the timeless appeal of stacked stone, the clean lines of a steel-lined rectangle, or the immersive experience of a sunken conversation pit, success comes down to proper excavation, drainage, and heat-resistant materials. Take the time to check local codes, prep the site correctly, and use firebrick or steel liners rated for direct flame. The result is a durable, safe feature that adds value and usable square footage to outdoor living areas.