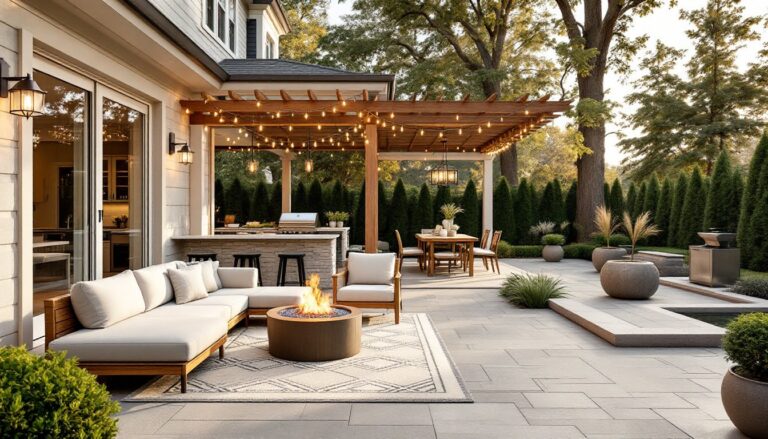
A standard pergola offers shade and structure, but adding a roof turns it into an all-weather outdoor room. Whether dealing with unpredictable spring rain or harsh summer sun, a roofed pergola extends usable outdoor time and protects furniture from the elements. The design choices range from retractable fabric systems to solid, shingled roofs that mimic traditional architecture. Each option carries different installation requirements, material costs, and maintenance considerations. This guide breaks down five practical roofing solutions, covering everything from budget-friendly DIY installs to permanent structures that may require permits, so homeowners can choose the best fit for their yard, skill level, and climate.
Table of Contents
ToggleKey Takeaways
- Adding a roof to your pergola transforms it into a functional outdoor room that provides 100% weather protection, UV defense (90–99% reduction), and shelter for furniture and outdoor equipment year-round.
- Five roofing solutions exist for different budgets and skill levels: retractable fabric ($200–$800 DIY), polycarbonate panels ($2–$4 per sq. ft.), solid roofs ($3,000–$8,000 installed), louvered systems ($2,500–$6,000+), and motorized options for premium automation and control.
- Pergola roof installation varies by type—fabric and polycarbonate can be DIY-friendly weekend projects, while solid roofs typically require permitting, building inspections, and professional installation in most jurisdictions.
- Proper drainage, ceiling height (minimum 8 feet), electrical planning, and ventilation are essential design considerations to ensure comfort, functionality, and longevity of your roofed pergola.
- Material durability ranges significantly: fabric roofs last 5–8 years, polycarbonate 10–15 years, and solid roofs 20–50 years, so budget for maintenance and replacement based on your climate and chosen material.
Why Add a Roof to Your Pergola?
An open-beam pergola provides partial shade but leaves occupants exposed to rain, intense UV, and falling debris. Adding a roof creates a defined outdoor ceiling that blocks 100% of precipitation and significantly reduces heat buildup underneath.
Weather protection is the primary driver. A roofed pergola allows outdoor dining and entertaining even during light rain or unexpected showers. It also shields cushions, grills, and outdoor electronics from water damage.
UV defense matters for both people and materials. Fabric, polycarbonate, and solid roofs all block more UV radiation than slatted beams alone, reducing sun exposure by 90–99% depending on material. This extends the lifespan of outdoor furniture and reduces fading.
Expanded functionality comes into play when the structure becomes a true outdoor room. Homeowners often add ceiling fans, pendant lighting, or even outdoor heaters beneath a solid roof, upgrades that aren’t practical under an open pergola. Electrical work in a roofed structure must follow NEC standards for wet or damp locations, and many jurisdictions require permits for covered structures over a certain square footage (commonly 120–200 sq. ft.).
A roof also adds architectural definition. It creates a visual transition between home and yard, especially when the roofing material complements the main structure’s style.
Retractable Fabric Roofs for Flexible Shade
Retractable fabric systems use tensioned canvas or polyester stretched across a track or cable system, allowing users to slide the covering open or closed as needed. This setup offers maximum flexibility and is one of the most DIY-friendly roofing options.
Materials typically include solution-dyed acrylic (Sunbrella or similar), which resists UV degradation and mildew, or PVC-coated polyester, which is more waterproof but less breathable. Acrylic blocks 90–98% of UV but is water-resistant, not waterproof, it sheds light rain but will seep under heavy downpours. PVC is fully waterproof and often used in commercial shade structures.
Installation involves mounting tracks to the pergola’s beams (usually 4×4 or 6×6 posts) and threading fabric panels through grommets or sleeves. Most kits require drilling pilot holes and using stainless steel hardware to prevent rust. A two-person installation takes 4–6 hours for a 10×12-foot pergola.
Cost runs $200–$800 for DIY fabric kits, depending on size and fabric grade. Professional motorized retractable systems with weather sensors start around $2,500.
One downside: fabrics require seasonal cleaning and eventual replacement (typically every 5–8 years, depending on sun exposure). They’re ideal for climates with moderate weather and for homeowners who prefer an open feel on clear days. Many outdoor living projects feature retractable systems for their adaptability across seasons.
Polycarbonate and Clear Panel Options
Polycarbonate panels deliver permanent, waterproof coverage while maintaining light transmission. These corrugated or flat sheets install directly onto the pergola’s rafter system and are available in clear, bronze, or translucent white finishes.
Panel types include twin-wall (two layers with internal ribs for insulation) and corrugated single-layer. Twin-wall polycarbonate is 8–10mm thick, provides better UV filtering (up to 99%), and offers slight thermal insulation, helpful in hot climates. Corrugated panels are lighter, less expensive, and easier to cut with a circular saw equipped with a fine-tooth blade.
Installation requires attaching panels to 2×6 or 2×8 rafters using specialized polycarbonate screws with neoprene washers (to allow thermal expansion without cracking). Panels overlap by one corrugation and are sealed with aluminum H-channels or closure strips at eaves to prevent insect entry. A 12×16-foot pergola typically needs 8–12 panels and takes a full weekend to install with basic carpentry skills.
Pros: Polycarbonate is impact-resistant (won’t shatter like glass), lightweight, and requires zero maintenance beyond occasional hosing. It’s also significantly cheaper than glass, around $2–$4 per square foot.
Cons: Panels can yellow over time with prolonged UV exposure (though UV-coated versions slow this process), and they produce a hollow sound during heavy rain. Clear panels also create a greenhouse effect underneath, raising temperatures by 10–15°F on sunny days unless paired with ventilation or fans.
This option suits DIYers comfortable with measuring, cutting, and fastening roofing materials, and it works well in wet climates where year-round rain protection is essential.
Traditional Solid Roof Pergolas
A solid roof transforms a pergola into a pavilion, a fully enclosed overhead structure that blends seamlessly with a home’s existing architecture. These roofs use the same materials as house roofs: asphalt shingles, metal panels, or even tile, supported by a traditional rafter-and-sheathing system.
Structural requirements are more demanding. Rafters must be sized to handle dead load (roof material weight), live load (snow, maintenance access), and wind uplift. In most regions, 2×6 rafters at 16-inch spacing suffice for spans under 10 feet, but longer spans or heavy snow loads require 2×8 or engineered lumber. Always check local IRC codes for rafter span tables specific to your area.
The build process involves:
- Install rafters between the pergola’s header beams, securing with joist hangers or rafter ties.
- Add roof sheathing: ½-inch or ⅝-inch CDX plywood or OSB, fastened every 6 inches along rafters.
- Apply underlayment: 30-pound felt or synthetic underlayment (Ice & Water Shield at eaves in cold climates).
- Install roofing material: Asphalt shingles (most common, 20–30 year lifespan, $90–$150 per square), standing-seam metal ($400–$700 per square, 40+ year lifespan), or corrugated metal for a farmhouse aesthetic.
Permitting is almost always required for solid-roof pergolas, as they’re classified as permanent structures. Expect plan review, inspections, and possible setback restrictions.
Cost ranges from $3,000–$8,000 for a 12×16-foot structure (materials and DIY labor) or $8,000–$15,000 with professional installation. This approach suits homeowners seeking a true outdoor room with the option to add insulation, ceiling finishes, or integrated gutters. Detailed step-by-step construction guides often walk through framing and roofing techniques for backyard pavilions.
Louvered Roof Systems for Adjustable Coverage
Louvered roofs use rotating horizontal slats (louvers) that pivot from fully open to fully closed, offering precise control over sunlight and rain protection. High-end systems include motorization, rain sensors, and smartphone integration.
Construction involves aluminum or vinyl louvers mounted on a track system with a manual crank or electric motor. When closed, louvers overlap to create a watertight seal with integrated gutters that channel runoff to downspouts. When open, they stack to allow full sky exposure.
Manual systems cost $2,500–$5,000 for a 10×12-foot kit and require two people for assembly (typically 8–12 hours). The louvers attach to an aluminum frame that bolts onto the pergola’s posts, which must be reinforced to handle the added weight and wind load, often requiring upgrading to 6×6 posts or adding diagonal bracing.
Motorized systems start around $6,000 and can integrate with home automation platforms. They’re ideal for larger pergolas (16×20 feet or more) where manual cranking becomes impractical.
Advantages: Louvered roofs provide the most versatility, allowing homeowners to adjust coverage throughout the day. They handle rain as effectively as solid roofs but maintain an open-air feel when desired. Many home improvement how-tos highlight louvered systems for their blend of form and function in modern outdoor spaces.
Drawbacks: Cost is the primary barrier, and repairs (motor failure, track obstructions) can be expensive. Snow loads must be carefully considered in northern climates, as accumulated snow can damage louvers if not cleared promptly.
This option appeals to homeowners who want high-end aesthetics and functionality and are willing to invest in a premium product.
Design Tips for Roofed Pergolas
Match architectural style. A gabled solid roof with asphalt shingles complements traditional homes, while a flat polycarbonate or louvered system suits modern architecture. Metal roofing works well with farmhouse or industrial styles.
Plan for drainage. Any roofing material that sheds water requires gutters or a gravel drainage bed beneath eaves. Solid roofs should slope at least ¼ inch per foot to prevent ponding. Polycarbonate panels must be installed with corrugations running perpendicular to the pergola’s length for proper water runoff.
Consider ceiling height. A roofed pergola feels enclosed if the ceiling is too low. Aim for at least 8 feet of clearance from the deck or patio surface to the underside of the roof structure. Taller is better for ventilation and visual openness.
Add lighting early. Running electrical before the roof goes on is far easier than retrofitting. Use junction boxes rated for wet locations and low-voltage LED strips, pendant lights, or recessed cans depending on roof type. Surface-mount fixtures work best with solid roofs: cable-suspended pendants suit open or louvered designs.
Ventilation matters. Solid roofs trap heat unless airflow is planned. Leave gaps at the ridge, install gable vents, or use a ceiling fan to move air. Polycarbonate roofs benefit from open sides or retractable screens.
Permit check. Before purchasing materials, verify local requirements. Many municipalities classify roofed pergolas as accessory structures requiring setbacks (often 5–10 feet from property lines), height limits, and inspections. Skipping permits can complicate future home sales or insurance claims.
Material longevity. Fabric lasts 5–8 years, polycarbonate 10–15 years (longer with UV coating), and solid roofs 20–50 years depending on material. Budget for eventual replacement or maintenance when choosing.
Conclusion
Adding a roof to a pergola turns an architectural accent into a functional outdoor living space. Retractable fabrics suit flexibility, polycarbonate balances light and weather protection, solid roofs deliver permanence, and louvered systems offer premium adjustability. Each option involves different skill levels, costs, and long-term maintenance. Homeowners should match the roof type to their climate, aesthetic preferences, and willingness to tackle permitting or structural reinforcement. With proper planning and material selection, a roofed pergola extends outdoor enjoyment across all four seasons.